HOW TO MAKE PELICAN ISLAND TERRARIUM

If you have a green thumb but minimal garden space, why not create your own mini green world by making your own terrariums? Terrariums are beautiful indoor gardens, which can add a green charm to your home and it fits on a tabletop.
They are easy-to-make, low-maintenance gardens and can last almost indefinitely with minimal water.
TERRARIUM GROWING FACTS:


HOW TO MAKE A TERRARIUM:

1) Prepare the Container
Wipe the glass container clean and get it ready for set up in a comfortable space. A table or a platform where you can stand and work is preferable.
2) Add Your Drainage Layers

Once you are ready to make your terrarium, fill the bottom most layer of the container with clay pellets. They are best for water drainage. Plants don’t like to have soggy feet all the time. This layer (approx. 2 inches or less, deep) will helps draining extra water from the layers above.
Then add Biochar to this layer. Biochar is very essential as it provides stability for the tiny ecosystem inside the glass pot.

Now cover the clay pellets with a layer of coconut coir. Coconut coir plays many roles - it helps in holding the soil and plants above, maintains a balanced pH and keeps it airy inside.

3) Add Growing Medium/Soil
Now add the growing medium. Make sure that the depth of this layer is not more than 2 inches.
4) Add Plants

Each kit contains a few plants which come in net pots. You can gently untangle the roots of the plants and remove them from the net pots OR you may plant them with the net pot itself.
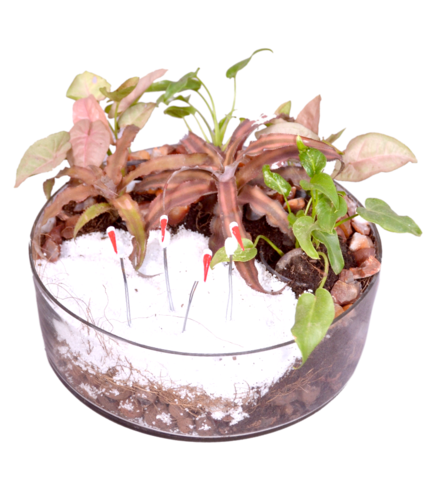
Observe the arrangement of these plants in the main picture. Use the back of a spoon to mark rough locations of all the plants inside. You may decide to go for the same arrangement in the picture or may want to create your own. Now gently make small holes in the soil layer and place the plants. Make sure that the plants are tucked in stably, with roots all covered and stem and leaves above the soil.

5) Accessorize

You can use the sand to “fix” in the base of the plant to provide more strength for their growth. You can create your own positive (occupied) and negative (empty) space inside the terrarium and try to strike a balance in your own way. Add the given accessories to create your own unique Terrarium.

6) Clean the Pot and Water
You will likely have dirt all over the sides of the container. Wipe it down with dry towel, so you can enjoy the beautiful living world inside. Give the terrarium a little bit of water. Unlike most of your house plants, a terrarium doesn’t need to soaked: just a couple of shots of water should get it growing.
Tips & Tricks:
- After initial watering, monitor your terrarium's water needs based on how dry the soil is. Water your terrarium only occasionally. Use a small watering can or a cup to water the surface inside the container. Avoid over watering so that the soil doesn’t get saturated.
- To maintain the health of your terrarium, remove dead leaves from plants immediately.
- Do not place your terrarium in direct sunlight. Remember that these are essentially little greenhouses and direct sunlight through the glass will trap heat and scorch the plants. Place in indirect light for best results.
So, get your hands dirty and create your own living masterpieces with our Terrarium GIY Kits!
Related post

12
Jul

23
Feb

17
Feb

03
Feb
RECENT POSTS

